Tuesday, March 25, 2014

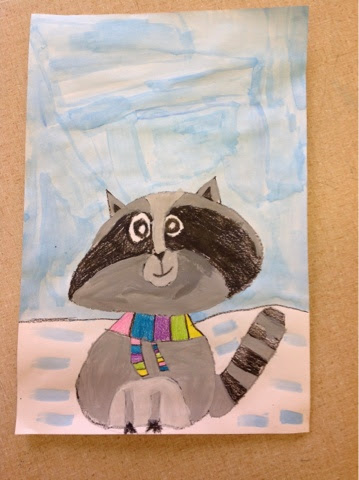
Raccoons in winter!

Hopefully we've seen the last of wintry weather for our area!  2nd graders finished up their winter raccoons just in time! 


Wednesday, March 19, 2014

How to catch a Leprechaun!

I'm a little late in posting these, but my sweet Lydia had to create a leprechaun trap for school!  We painted a birdhouse together and added some whimsical decorations!

The "trap" part is the little door propped open with a toothpick.  The string comes from inside the "motel" and a little sign invites the the leprechaun to pull the string to ring the service bell.  When he does, the string pulls the door closed and he is trapped inside.  (Supposedly!)  

We didn't catch the leprechaun this year, but I still think Lydia had a great time creating her trap! 

Monday, March 17, 2014

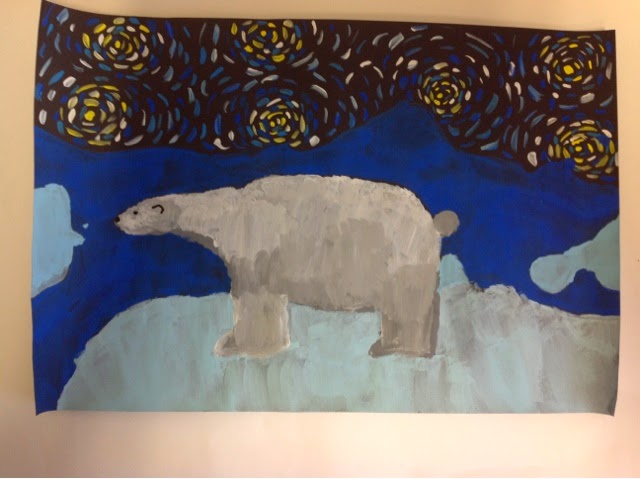
A polar bear's Starry night!

3rd graders are finally finishing up their polar bear projects!  This one has taken a while to complete!  We started with the polar bear drawing.  Then we practiced shading on our bears with gray and white paint, and making the fur with short choppy brush strokes. A beautiful starry night sky tops off these awesome winter scenes!


Thursday, March 13, 2014

Monitor and adjust! Self portraits in paint!

Being at two schools has its disadvantages... One being the lack of matching supplies!  As much as possible, I try to be sure I have the same stock at each school, however sometimes I run out and have to improvise!  For example, I was out of black construction paper at one of my schools when we began self portraits... So, instead of just coloring on white paper with regular crayons, I decide to let them paint.  I am so glad I had this little mishap, as the results turned out beautifully!


Thursday, March 6, 2014

Who says shamrocks have to be green? :)


I attempted a freehand shamrock drawing last week with 1st grade...

epic fail.... :(


So, I felt I needed to redeem the shamrock by pulling out my heart cookie cutters and trying it again!  This time with third grade.  We are using the shamrock project to learn about analogous colors and blending.  Once they finished tracing the hearts, with sides and bottoms touching, they added stems.  I handed out color wheels and we discussed analogous colors and blending.  The they went to town, coloring with crayola color sticks!  The blending almost makes some of them glow!  I'll post more pics as they finish up!


Monday, February 24, 2014

Over the river and through the woods!

We are working with watercolor in 5th grade to create these beautiful winter scenes.  We discussed opacity in regards to different types of paint, and learning how we have to work from lightest to darkest with watercolor.  By letting each area dry thoroughly, we avoid unwanted "explosions" of color. More pictures coming soon! 


Thursday, February 20, 2014

Snowflakes

 Several years ago before the birth of Pinterest, :) I found an online tutorial for these gorgeous 3-dimensional snowflakes.  I make these almost every year with my fifth graders.  Rather than repeat the steps, the instructions can be found here.  To simplify the process, I put a tape dispenser and a stapler on each table.  We used 6 inch white squares for the larger one, and 3 inch for the smaller...


Just beautiful and perfect for the weather we've been having lately!  


Wednesday, February 19, 2014

WHERE IS THE RED?!?!?!?!?!

Anyone else frustrated with the lack of RED in Crayola's construction paper crayons?  Me too!  It's amazing how limited you are when you don't have red.  I discovered a solution by accident last year as we were working on these adorable self portraits in 1st grade.  There was not a great color for lighter skintones, and I had the new Crayola Color Sticks, which I also love.  The color sticks are also limited color choices, but by combining color sticks and construction paper crayons on this project, the results were just perfect!  Color sticks are a unique material, they're not like crayons, or chalk, or even a colored pencil.  I love using them on dark papers, but they are also great on white.


Finally!! A red that works on black paper!!


I just love how these turn out each year!


Monday, February 17, 2014

Fox Box Instructions

I posted the fox boxes at the end of last year and had someone ask for the instructions, so here they are!  I hope you can make sense of the pictures, sometimes its difficult to see the folds in photographs!
Start with three squares, I used 6 inch squares for my fox box.  


Fold one square in half on the diagonal.


Then fold in half again, and unfold, leaving a guide fold.


Fold each bottom corner up to the top corner, lining the edge up with the guide fold crease, forming a diamond.  These will become the fox's ears.


Rotate the unit around and fold up the inside layer of paper to make the fox's nose. 


Repeat these steps with the remaining two squares...


To assemble, turn the fox faces all toward the center, with the back of the heads all turned out, and remember that the mouths eat the ears!  Insert both ears of one fox into the mouth of another...


Then slide them together as far as they will go...


Carefully put the ears of the last fox into the mouth of the partially assembled piece... that leaves a set of ears and a mouth....


Insert the last set of ears into the only remaining "mouth."


Wiggle the pieces together, trying to close up the opening on each side where all the colors come together.  Now you're finished! :)  Sometimes if students finish early, I allow them to challenge themselves by making a smaller box, and then smaller, to see how small they can make one!  Have fun!